
Before you start #
Availability and permissions
- Website editing permission and a saved website draft.
Have these ready
- Save any open setup changes first. Decide which page and section you want to change.
What to do #
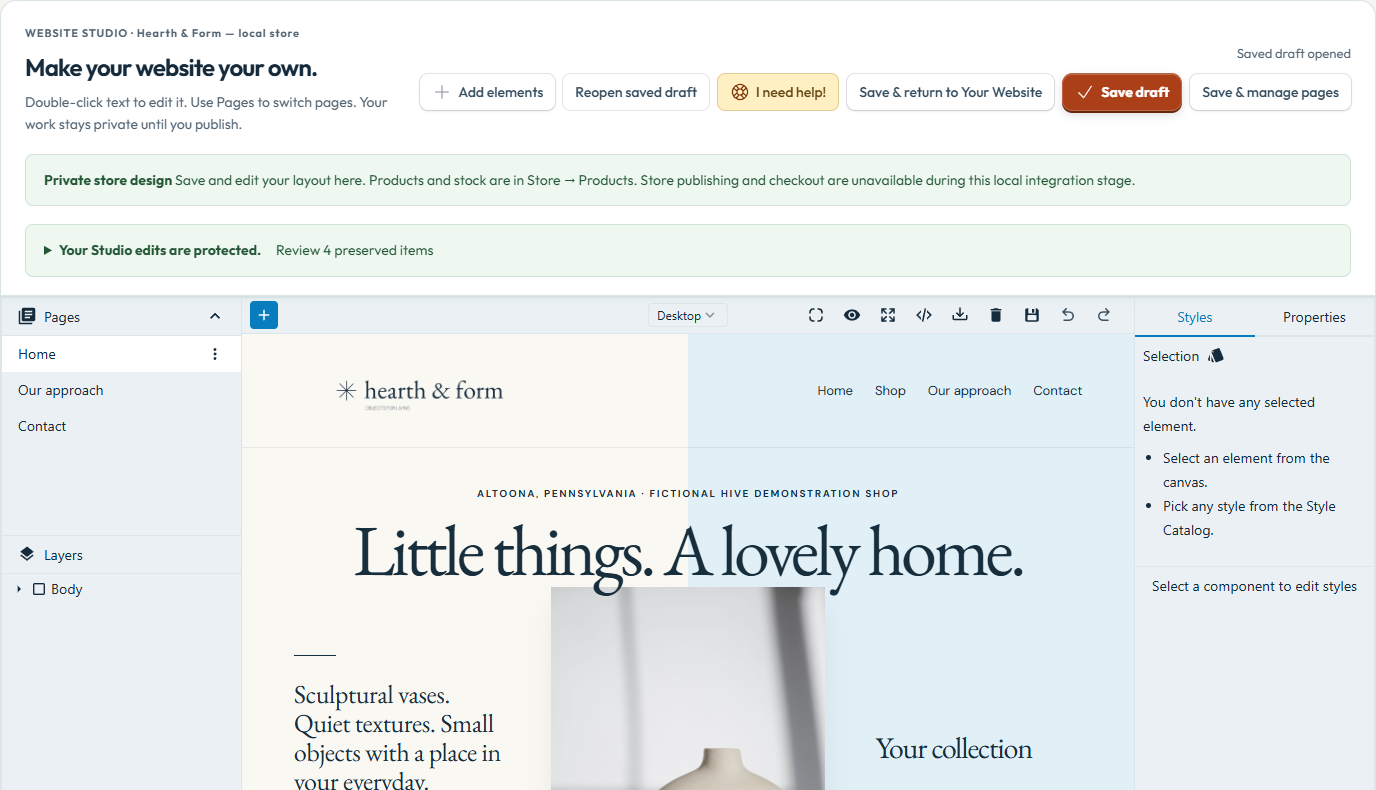
- Open Studio from the dashboard or Open Studio from Your website. Wait for the saved draft to open.
- Use Pages to choose the page. Double-click editable text to change its wording. Select the intended element before using its supported settings.
- Choose images you own or are licensed to use. Set meaningful alternative text when the image carries information; avoid putting essential words only in an image.
- Use page and navigation controls to check names and destinations. Store collection components use real catalog data; edit product prices and stock in Store products, not in decorative text.
- Use the device preview controls to inspect desktop and phone layouts. Check wrapping, image crops, menus and buttons.
- Choose Save draft. Reopen saved draft only when you intend to load the saved version. Use Save & return to setup or Save & manage pages when those actions fit your next step.
- Use the separate Publish or Update action only after reviewing the saved draft and the final confirmation.
What to know #
A preview is not a publication. Removed sections should stay removed; switching templates or starting over is not a normal way to edit a saved site.
The local agent preview can assist only within its authorized demonstration scope. Studio remains the native editing workflow.
What success looks like #
Your saved draft reopens with editable text, images and sections intact.
If something goes wrong #
- Wrong layer selected? Use the editor’s element/layer selection and inspect the preview before changing settings.
- Conflict or failed save? Keep a copy of unsaved text and follow the recovery guide.
To share a specific section, use the # link beside its heading and copy the address. To save or print this guide, use your browser’s Print command.